In this tutorial, I will show you an effective technique to highlight specific areas in your images with color: The so-called Color Key effect. With Affinity Photo, you can quickly convert an image to black and white – except for a selected object, such as a ladybug. This method is particularly useful for directing attention to specific elements in an image while keeping the rest of the image neutral.
Main Insights
With the new feature in Affinity 2.0, you can quickly and efficiently mask and highlight color areas. By selectively hiding colors, you create interesting visual effects that enhance your images.
Step-by-Step Guide
To create the Color Key effect in Affinity Photo, follow these steps:
Start by opening your image in Affinity Photo. In this example, we are working with an image showing a ladybug that you will later highlight.
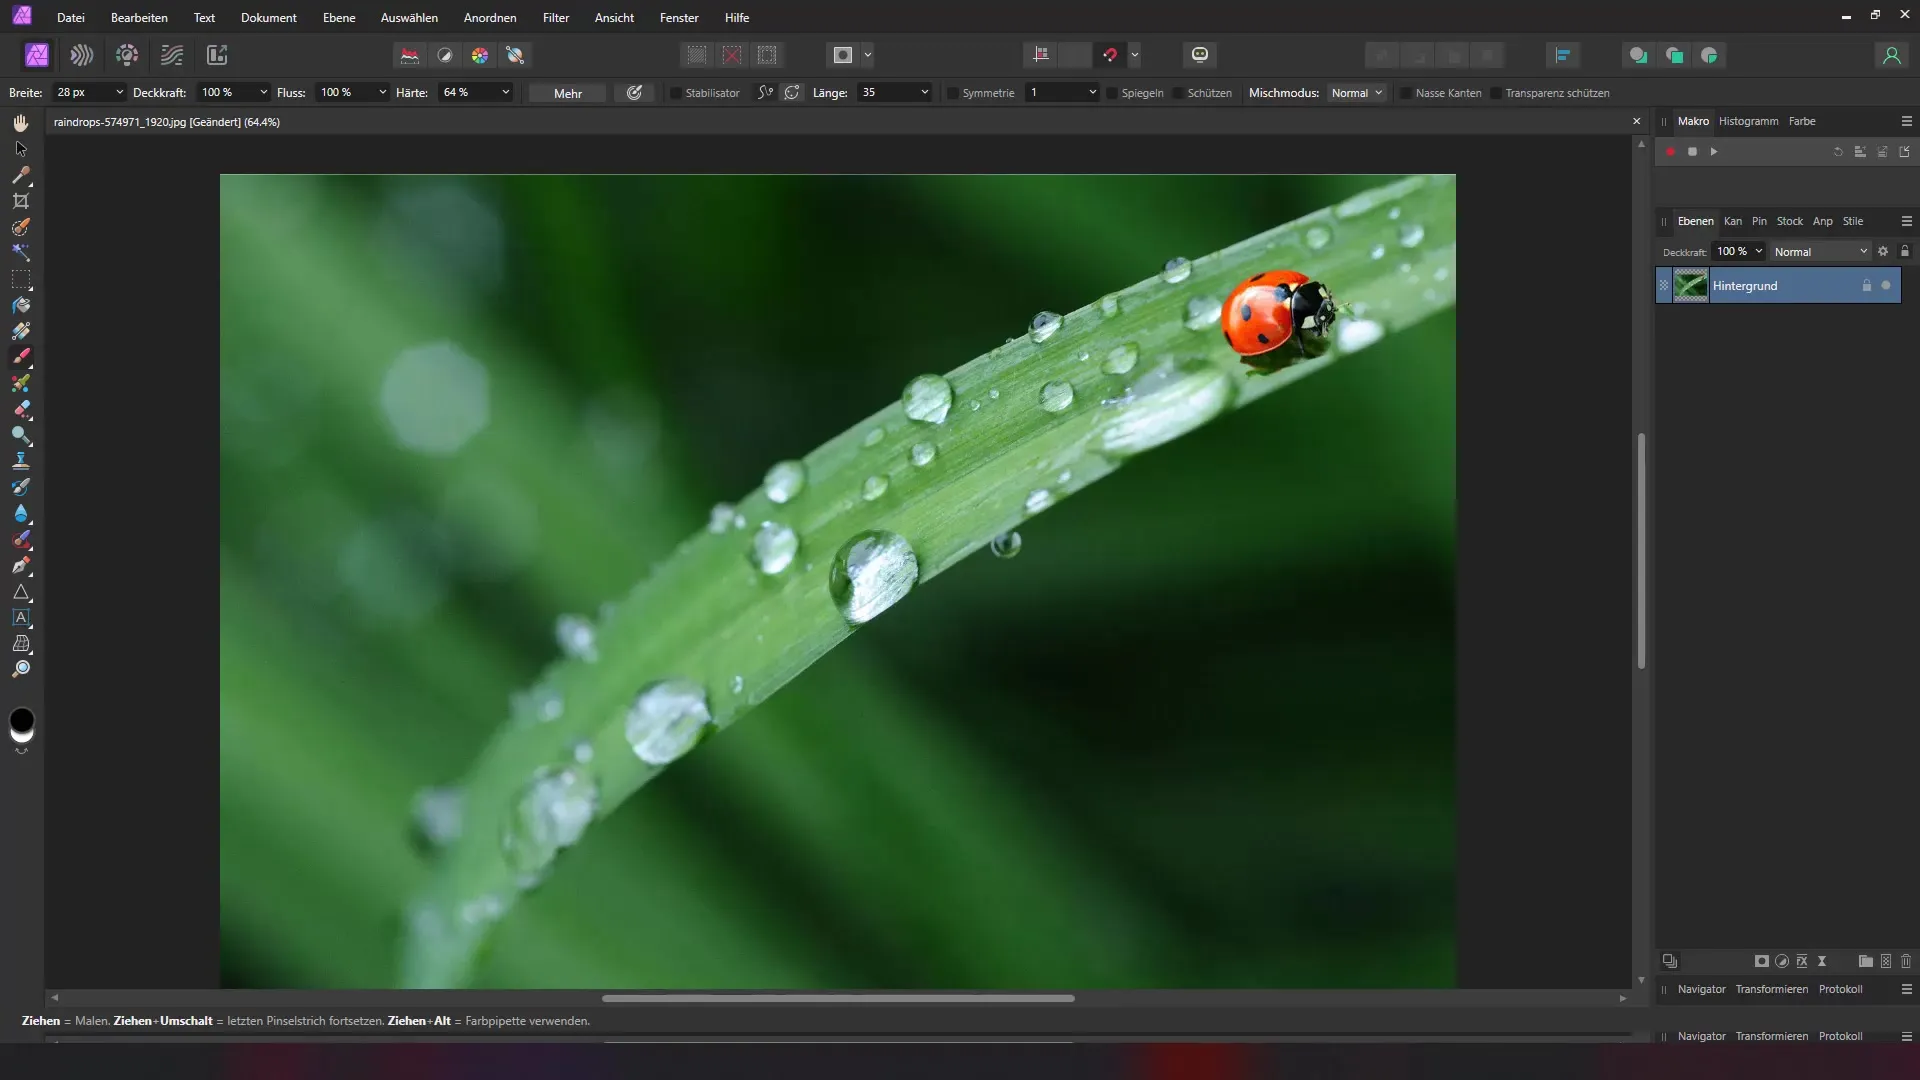
Once you have opened the image, the first step is to duplicate the image. To do this, press the Ctrl + J key combination.
Now you have a copy of your image. Select the duplicated layer and convert the image to black and white. Go to adjustment layers and choose the Black & White effect option.
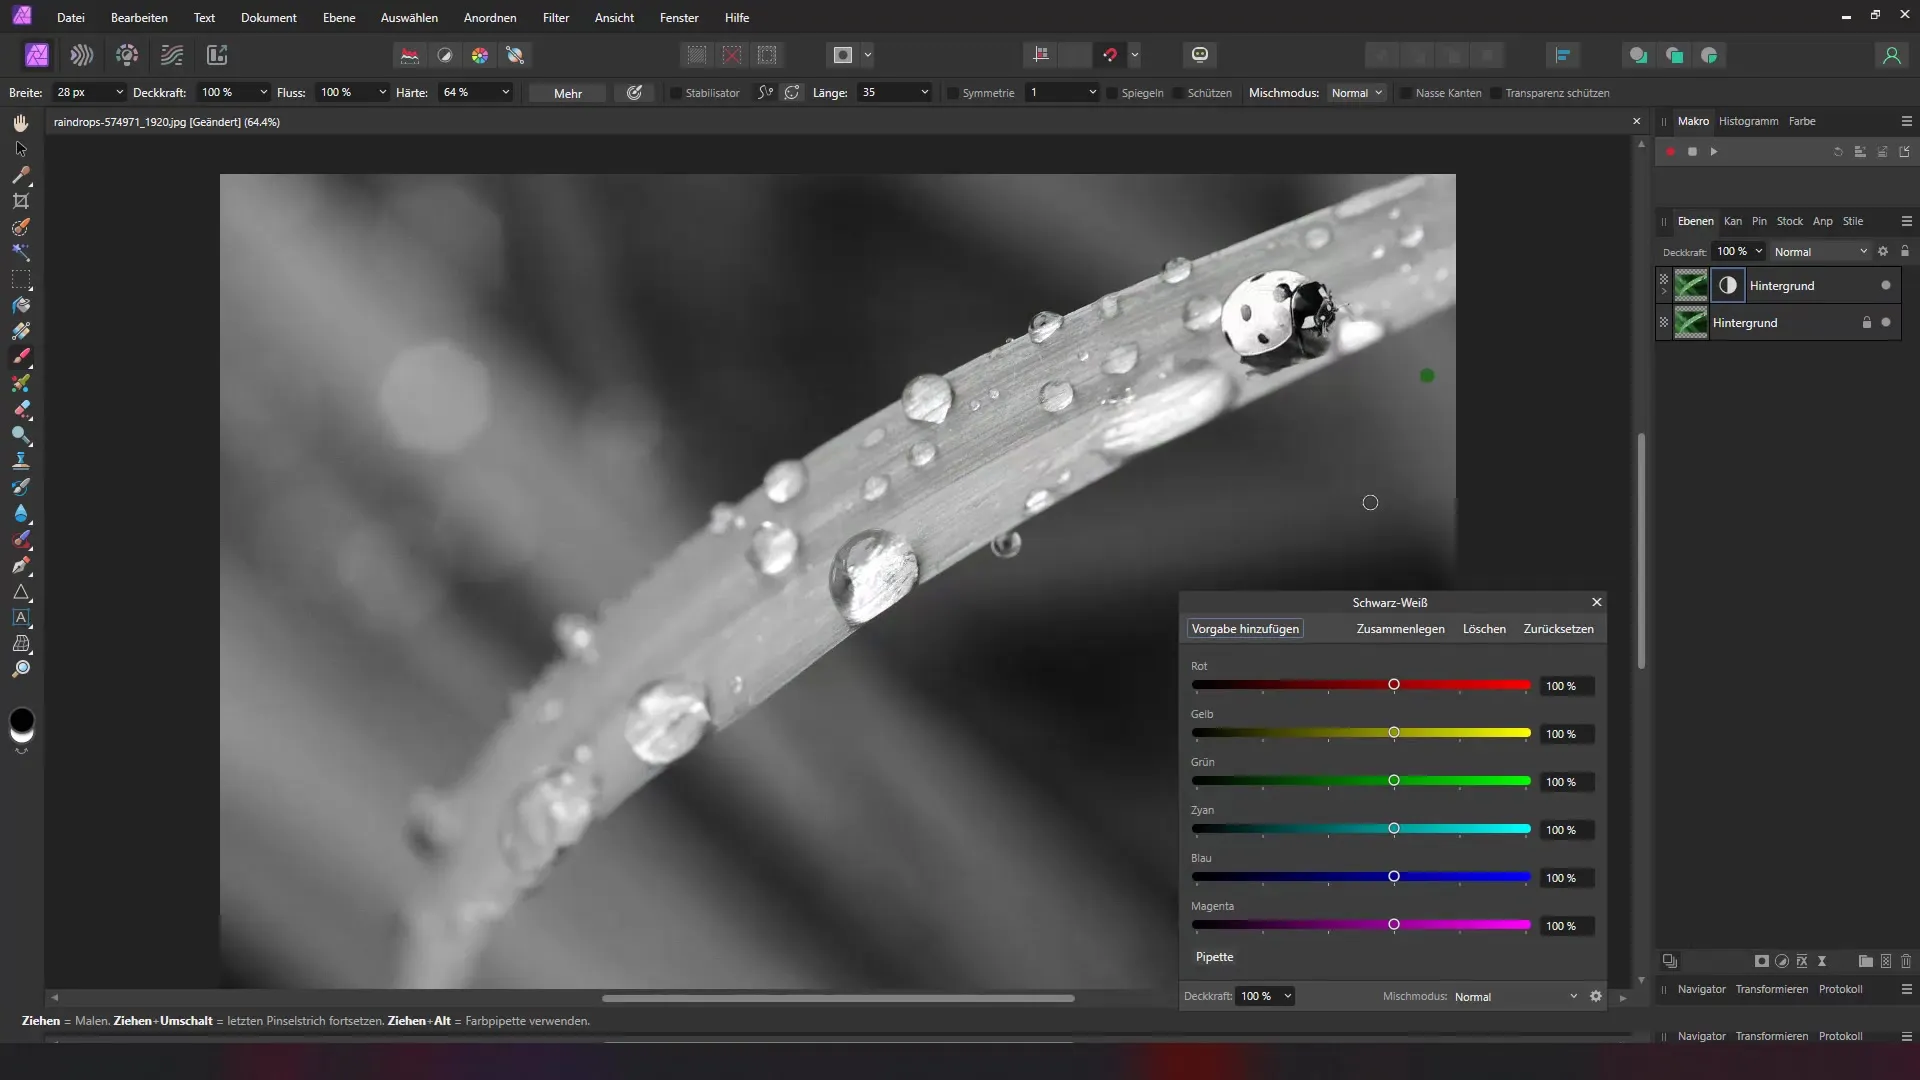
In the next step, you need to create a mask for the black and white adjustment. Click on the mask icon in the Layers panel to create a mask on the black and white layer. In this case, you want to invert the mask to hide it completely initially.
Now you have created a mask that hides all colors – the image should be completely black and white after this action. To highlight the ladybug in color, take a brush and make sure the foreground color is set to white. Paint over the ladybug area with the brush to make it visible.
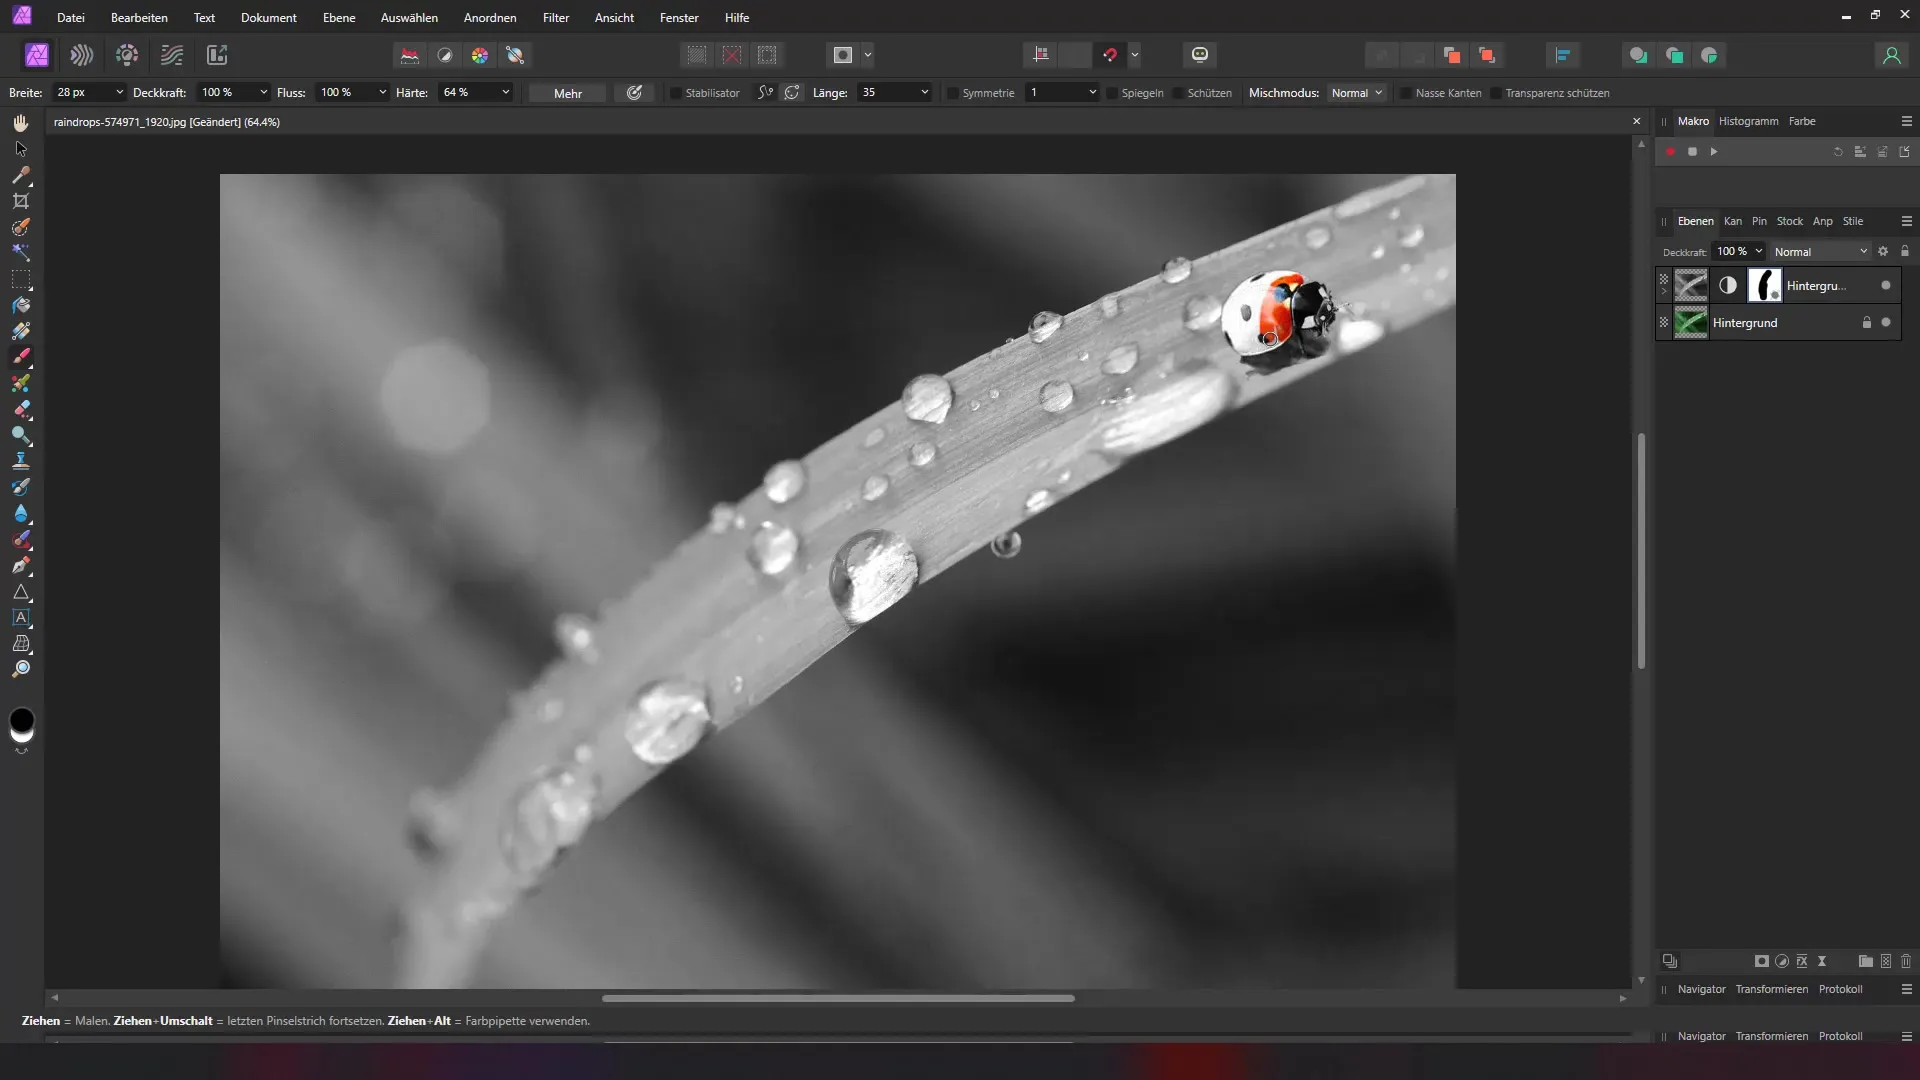
If you accidentally paint in other areas, you can quickly switch by pressing the X key. This allows you to correct the color mask by retracting the respective colors or focusing on other details.
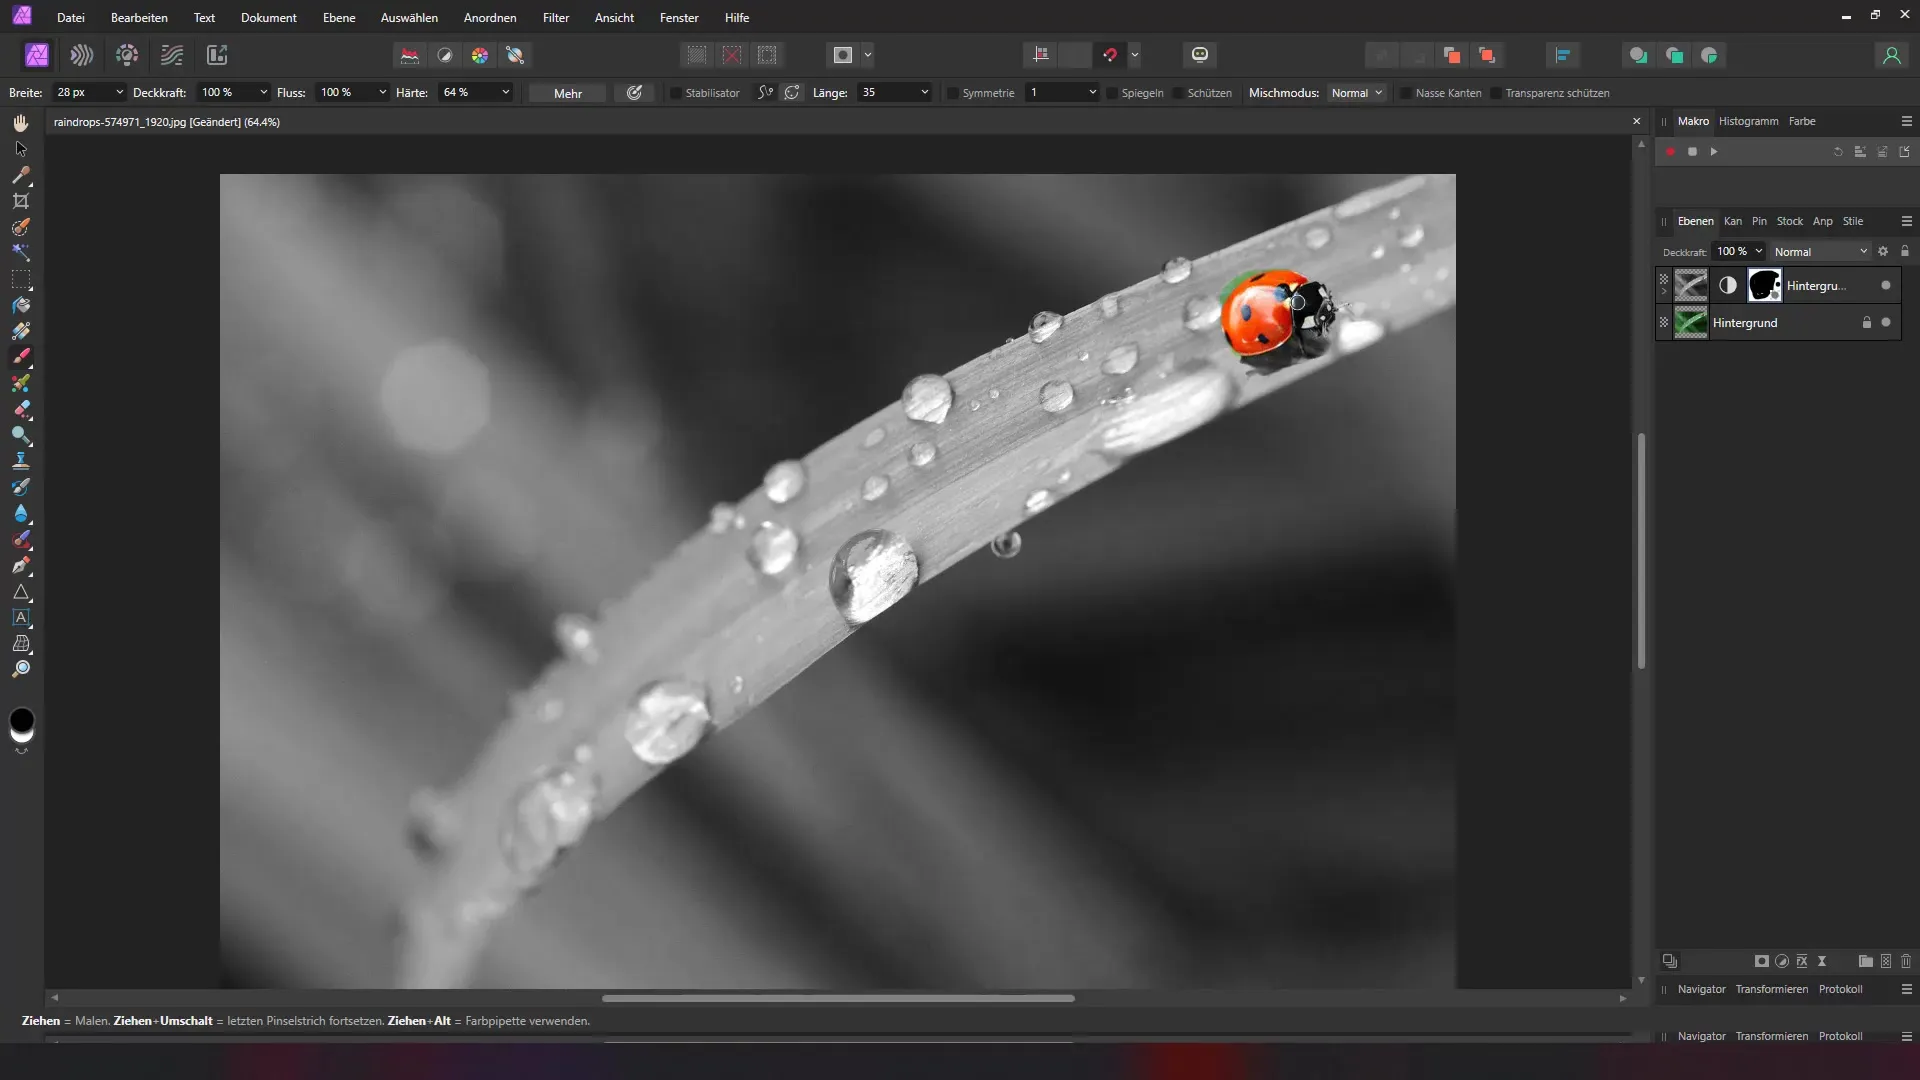
With Affinity 2.0, there is a new feature that makes working with masks easier. Click on the mask icon and select the Hue Range Mask. Make sure to hide everything related to the ladybug and focus on the red in the hue mask.
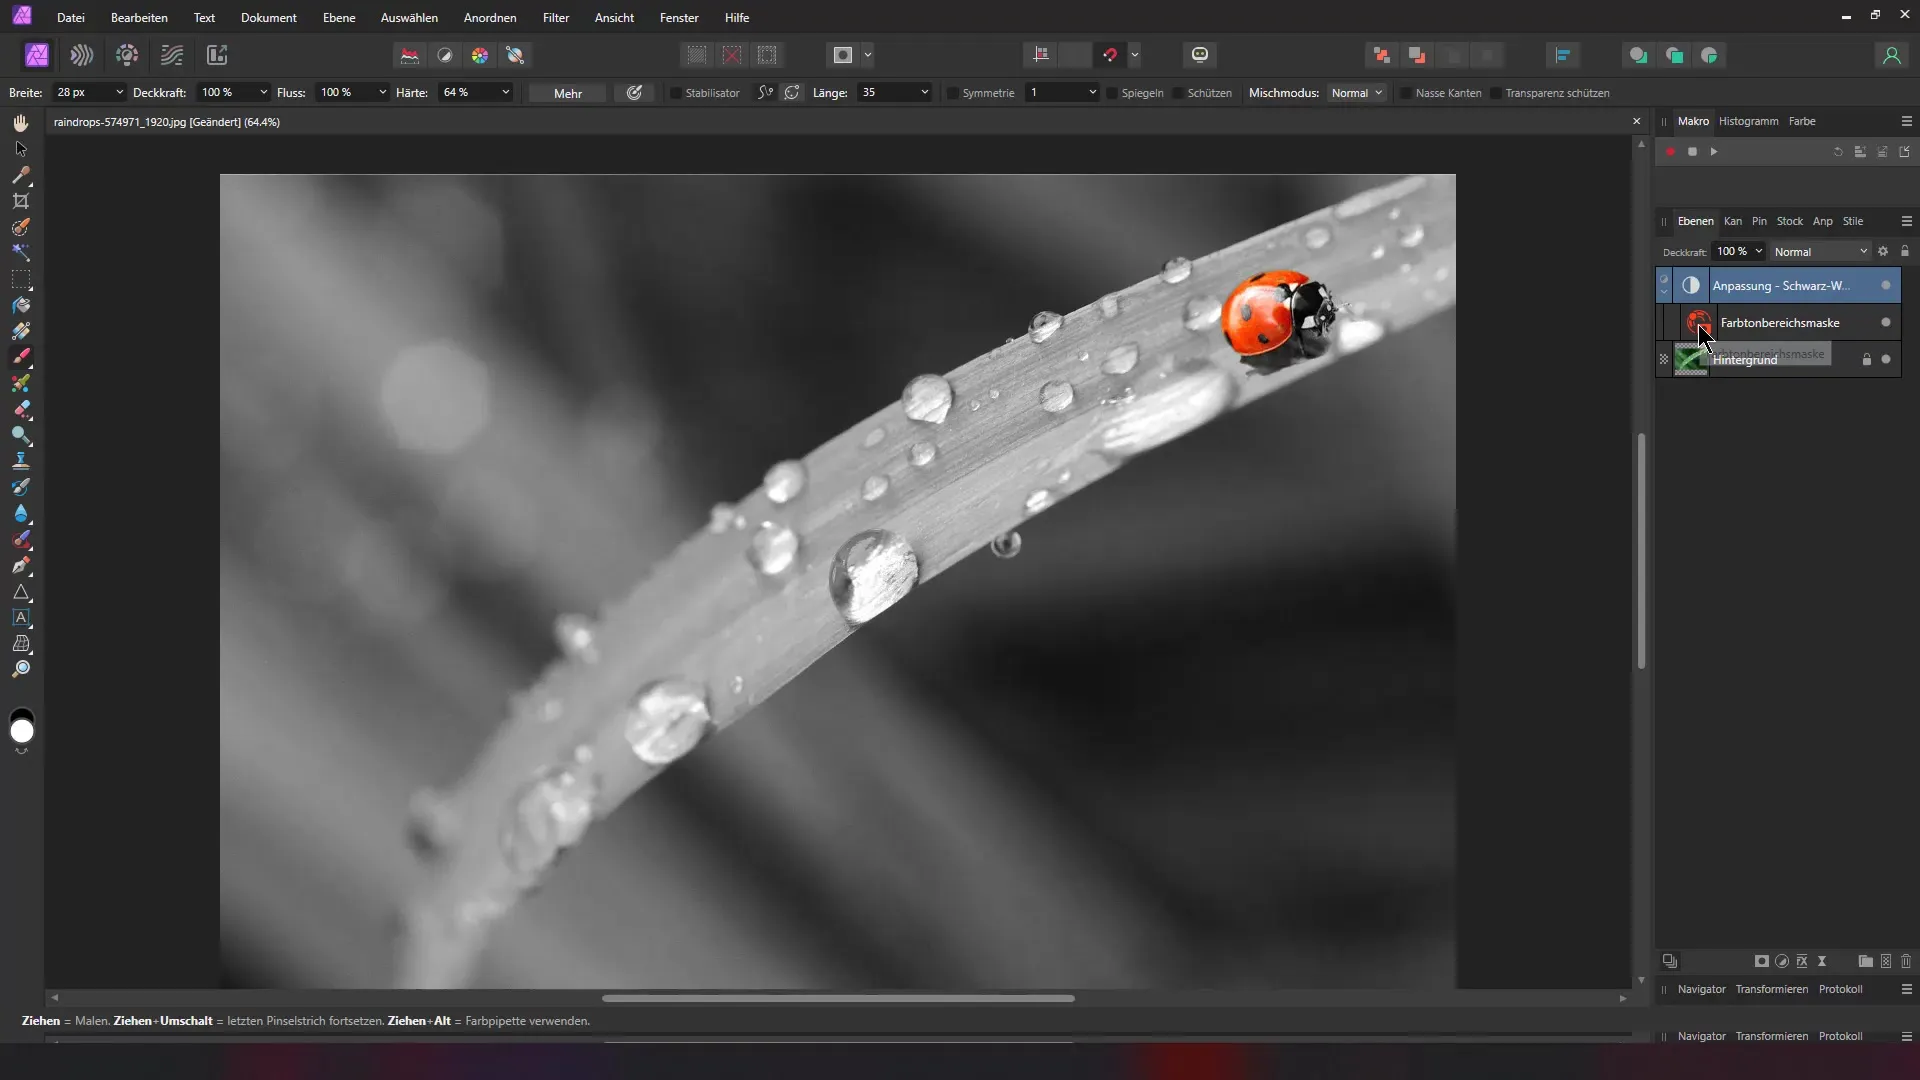
Once you have successfully adjusted the mask, confirm the changes and return to your black and white adjustment layer. Your order should now show only the ladybug in color while the rest of the image remains black and white.
To fine-tune the result, you can click on the adjustment layer and adjust additional color shades or areas as needed. For example, select the green hue and adjust it to match your vision, creating interesting visual contrasts.
This new feature in Affinity 2.0 is not only time-saving but also enhances the creative possibilities when editing your photos. You can now easily highlight or hide areas, revolutionizing your image editing!
I hope that you have gained valuable insights from this tutorial. Working with masks and hue ranges will help you make your images even more appealing.
Summary
In this guide, you learned how to create a Color Key effect with Affinity Photo. You followed the steps to create a black and white adjustment and utilize the new hue range mask to selectively highlight specific objects.
Frequently Asked Questions
How can I convert an image to black and white in Affinity Photo?You can convert the image using a Black & White adjustment layer.
What is the function of the hue range mask?The hue range mask allows you to selectively hide or highlight color ranges.
Can I adjust the color mask afterwards?Yes, you can adjust and fine-tune the color mask at any time.
How can I ensure that my brush correctly affects the color mask?Toggle between white and black using the X key to control painting on the mask.


